
KnightLight
KnightLight is a 2D puzzle platformer built entirely from scratch by a 7-person team in a custom C++ engine. As the Level Designer and UX/UI Designer, I programmed the complete menu architecture in custom C#, illustrated the interface pixel art, and designed the game's levels using JSON integration. Serving as the primary user for our programmer's custom tools, I also conducted rigorous QA testing and playtesting sessions to ensure a stable, polished commercial Steam release.
Project Details
Type: Game Project
Engine: Custom C++ Engine
Duration: 8 months
Team Size: 7
Platform: PC (Steam)
Year: 2023 - 2024
Key Contributions
-
Prototyping: Designed early level layouts and mechanics in a Unity prototype using Super Tiled2Unity and C# while the programming team was actively developing the custom engine.
-
Level Design & Implementation: Created three progressively challenging main levels using Tiled, mapping out collision and object data to directly integrate into the engine via JSON.
-
UI Design & Programming: Programmed the complete front-end experience in C#, building out dynamic main menu transitions, a modular pause system, and an interactive settings menu.
-
Menu Pixel Art & Animation: Illustrated custom pixel art and animations for the main menu and interface elements to ensure the UI aesthetically matched the game's lighting mechanics.
-
Tooltip System: Designed and programmed contextual in-game tooltips using custom trigger zones to naturally teach players new mechanics without interrupting gameplay.
-
Technical Documentation: Authored the Tiled Design Guide, a comprehensive pipeline manual that established strict level design standards, collider color-coding, and layer formatting rules.
-
Playtesting & Documentation: Conducted iterative playtest sessions and wrote detailed reports to refine level pacing, user interactions, and the overall stability of the team's custom tools.
-
Steam Release Assets: Created and formatted all the required store images for our public launch, including capsule art, library logos, and promotional screenshots.
Team: Luminosity

-
Adam Lonstein: Programmer
-
Evan Gray: Producer & Programmer
-
Jack Love: Programmer
-
Jared Callupe Lopez: Level Designer & UX/UI Designer
-
Lawrence Winters: Programmer
-
Taylor Cadwallader: Design Lead & Technical Designer View Portfolio
-
Travis Gronvold: Tech Lead & Programmer
Working as a 7-person team, we divided the workload between five programmers and two designers. The programming team built the custom C++ engine from scratch, engineering core features like custom 2D physics, tile-based lighting, JSON deserialization, C# scripting integration, and the editor interface. On the design side, I split duties with our Design Lead. While he focused on prototyping mechanics and implementing core gameplay elements, I concentrated on creating all level content and developing the visual and functional elements of the user interface.
Before the Engine: Research & Prototyping
During our first semester, our proprietary C++ engine was still in heavy development and not yet ready for gameplay integration. To ensure production didn't stall, we focused on brainstorming, genre research, and rapid prototyping. I researched key Hollow Knight design principles such as foreshadowing, backtracking, and hazard visibility in dark environments. This helped establish the core pillars for our lighting mechanics.

Early Concepts: The Unity Prototype
To test these mechanics before our engine was viable, I sketched early concepts in draft paper, refined them in Tiled, and implemented them in a Unity prototype using Super Tiled2Unity. This allowed us to map out the exact affordances and pacing for our knight player character.

Prototype main menu

Final prototype level layout (includes coins, two basic lamp types, and an enemy)

Prototype gameplay screenshot (notice the use of cables to connect lamps and doors)
User Research: Prototype Playtesting
We conducted weekly playtests on these Unity prototypes to refine player movement, jumping arcs, and flashlight aiming. Gathering this user research early allowed us to lock in our standardized player metrics so that once the custom engine was finally ready, I could immediately begin drafting the final levels to scale.

Level Design & Implementation: Drafts to JSON
Designing levels for a custom C++ engine meant I had to plan for specific technical constraints, like the engine's inability to support multiple tilesets in a single scene. To manage this, I started by drafting all three main levels on graph paper. These sketches were vital for mapping out the progression of mechanics, starting with basic movement and jumping, then moving into more complex interactions like lighting lamps to open doors and navigating hazards.


Level 1 draft vs. final render


Level 2 draft vs. final render


Level 3 draft vs. final render
Once the paper layouts were finalized, I moved into the Tiled editor to build the functional game world. I organized the levels into specific object layers, like colliders, hazards, and triggers, which were then converted into engine archetypes via JSON integration. I developed a color-coding system for these layers to make collaboration with our programmers easier, allowing them to quickly identify and map out the logic required for each interactive object in the scene.


Tiled editor featuring tile layers and color-coded object layers that are converted into engine archetypes upon import
To ensure consistency across the team and guarantee our custom engine parsed the maps correctly, I authored the Tiled Design Guide. This document detailed the strict layer specifications, RGB color codes for colliders, and the exact export settings required to successfully import Tiled maps into the engine.

Designing the UI: The Atmosphere
My primary UX goal in KnightLight was to merge atmosphere with clarity, ensuring the interface felt like a natural extension of the game's world. I designed the main menu start sequence to be diegetic from the first interaction by greeting players with a "left click to light up" prompt that syncs with the ambient soundtrack. This sequence deliberately prevents accidental input during initialization, while introducing players to the game's main mechanic. I built the entire transition using custom C# code rather than standard scene loads to ensure a seamless flow.

Main menu start sequence in-game
Working within a custom C++ engine meant encountering strict technical limitations. Particularly with our animation component, the engine required all imported spritesheets to have the exact same amount of rows and columns to be parsed correctly. To work around this constraint for the menu animations, I manually reformatted my UI spritesheets, such as the logo transitions, by padding them with empty slots. This allowed me to maintain a uniform grid structure so the engine could read the files without breaking the visual timing.
Various main menu spritesheets (notice the empty sprites for proper parsing)

In-engine animation component
Once inside the menu, I prioritized immersion by utilizing soft camera movements and alpha fading instead of abrupt screen switches. I built reusable menu navigation states in C#, allowing the player to slide smoothly into the options menu and adjust interactive volume sliders and visual toggles without ever needing to reload the scene.

Main menu navigation
From the main menu, players navigate into the Play menu to select a save file. Interestingly, our custom engine actually supports an infinite number of save files under the hood. However, from a UX perspective, scrolling through infinite slots isn't practical for a game of this scope, so I deliberately designed the UI architecture to only support and display three distinct save slots.


Play menu states (save file select, empty save file, save file info display, start transition)
I engineered the interface to pull data directly from the save data JSON files, dynamically populating each slot with real-time metrics like the player's current level, total playtime, last saved date, and collectible counts. To ensure players didn't accidentally wipe their progress, I implemented a deletion function that dynamically instantiates a confirmation prompt before erasing any data. I then expanded on this UX standard across the entire game, establishing consistent confirmations of destructive action for critical choices like quitting to the desktop or returning to the main menu from the pause screen.


Confirmations of destructive action in-game
Modular UI: Pause Menu
The pause menu was designed to clearly separate gameplay from the pause state. When opened, the world subtly dims and gameplay audio pauses, allowing players to navigate the interface without distraction. To optimize memory usage and keep the system highly modular, I programmed the menu to dynamically instantiate specific submenus only when requested. I also integrated audio group controls to ensure UI sound effects remained active while the main game audio paused, alongside an auto-pause feature for when the game window loses focus.

Modular pause menu system featuring quick access to live metrics
To teach mechanics contextually without breaking flow, I built an in-game tooltip system using custom trigger zones. Because the UI behavior was so similar, I optimized development by reusing a significant portion of the pause menu's C# architecture to build the tooltips. I also implemented state-checking logic to ensure the two systems never overlap. The game actively checks the pause state before rendering a tooltip, guaranteeing the UI remains clean and functional even if a player pauses exactly when a tooltip triggers.

Pause menu and tooltip systems in action
User Research: Full Game Playtesting
During the second semester, I conducted three major playtests, each dedicated to testing one of the three levels in the game, with the final session featuring all levels as a full game playtest. These sessions were invaluable for identifying pain points in both design and technical implementation, specifically regarding player movement, C# implementation within the engine, and the overall engine stability. Feedback from these sessions allowed us to refine gameplay, address technical issues, and ensure a smoother player experience across both player types.
Publishing: Steam Store Assets
Taking KnightLight to a commercial storefront like Steam required a completely different set of deliverables. I was responsible for producing the entire suite of marketing and branding assets required for our public release, ensuring the game's aesthetic remained impactful and legible across all store dimensions.
This process involved designing and formatting specific store capsules, library hero art, community icons, and promotional screenshots to meet Steam's strict resolution and aspect ratio guidelines. It was a valuable experience adapting in-game sprites into marketing materials that could stand out on a crowded digital storefront while preserving the game's core theme.


The complete suite of Steam store assets, including capsules, library artwork, and promotional screenshots
Post-Mortem: Optimizing Your Game
KnightLight was my first experience building a full-scale game in a proprietary game engine, and it fundamentally changed how I approach technical implementation. Taking a project from early prototyping to a commercial Steam release taught me the value of building for maintainability and scalability rather than just immediate functionality.
-
Code Redundancy & Helper Functions: Looking back at my C# scripts for the Pause Menu Manager, I identified significant redundancies in how UI elements were instantiated. Every element repeatedly set properties for position, scale, rotation, and text individually, which cluttered the code and was overall ineffective. Since then, I have learned more advanced C# and would now apply helper functions to optimize repetitive tasks like this. A custom function, would have allowed for a much cleaner architecture. This transition from raw manual calls to modular helper functions I now carry into all my technical UI work.


Repetitive code vs. Helper function
-
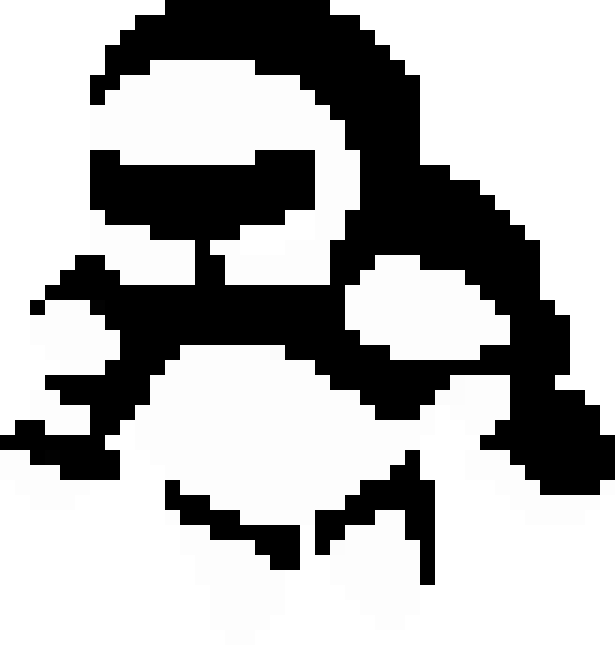
Scope Management & Pivoting: During our first semester, before the engine's technical constraints were fully defined, I designed a world map intended for a Metroidvania-style experience. However, as production progressed, it became clear this vision was vastly overscoped for our timeline and toolset. Rather than forcing a massive map with compromised quality, we made the strategic decision to pivot. I refactored the design into three highly focused, more linear levels. This pivot taught me the crucial developer skill of scaling down a design to ensure the final product is polished rather than just expansive.

Initial first-semester world map
-
Typography & Accessibility: Early in development, I designed a highly stylized title logo to match our theme. However, initial feedback quickly revealed that the typography was difficult to read at a glance. I realized that my aesthetic ambition was getting in the way of basic accessibility. I scrapped the initial design and iterated toward the final, blocky logo, which maintained our style while guaranteeing better readability on both menus and the Steam storefront.
An early iteration of the game's logo
-
Community Reception: Seeing the game find an active audience online was a profoundly rewarding experience, culminating in over 100 positive reviews on Steam. Because our pivot limited the game to three levels, a standard playthrough sits around 30 minutes. Reading reviews consistently asking for more content was incredibly validating for our core mechanics. Furthermore, it was fascinating to watch a speedrunning community emerge. Seeing players completely break our collision systems to clear the game in a couple of minutes was a humbling reminder of how players love to push boundaries.
Play The Game!
If you want to see our work in action, KnightLight is available to play for free on Steam. We packed it with a set of unlockable achievements, so consider this my personal challenge to you to try and collect them all! If you decide to try it out, I'd love to hear what you think, so please feel free to reach out or leave a review.